Effortlessly Convert Google Photos Memories Presentations into Engaging Instagram Reels: A Comprehensive Guide
- Step 1: Choose Your Google Photos Memories Presentation
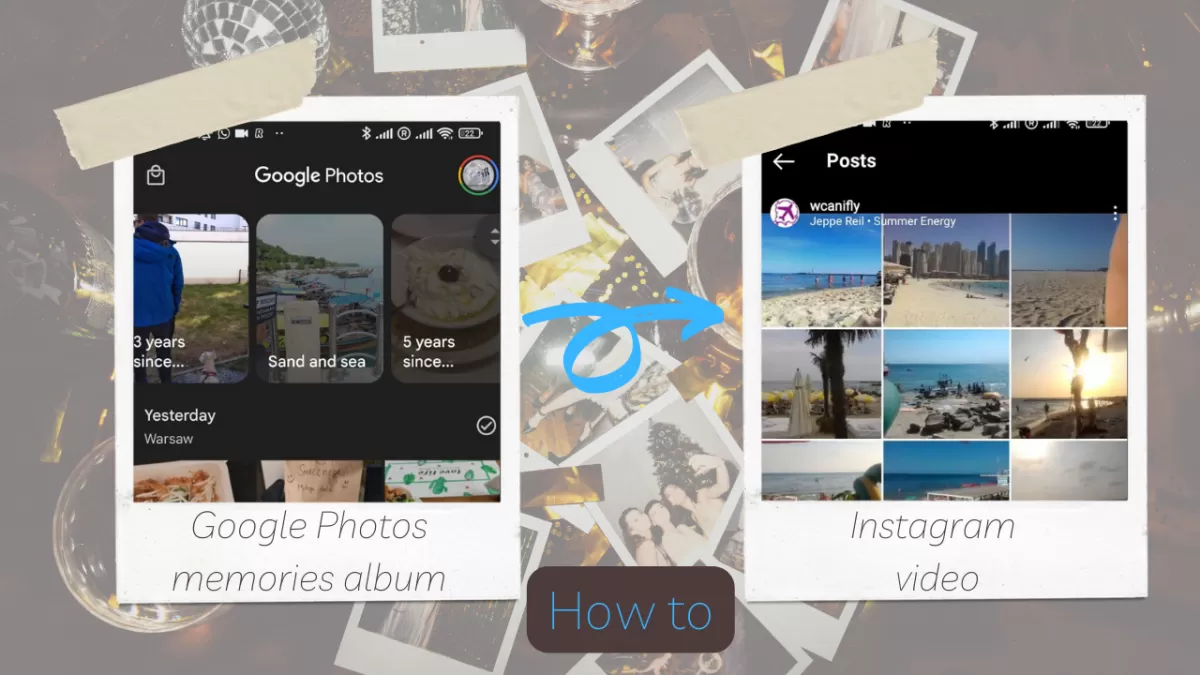
- Step 2: Utilize the Google Photos Sharing Option
- Step 3: Share the Selected Photos to Instagram
- Step 4: Import the Photos into Instagram Reels
- Step 5: Customize Your Instagram Reel
- Step 6: Add Music and Text
- Step 7: Preview and Share Your Instagram Reel
- Conclusion
Instagram Reels has rapidly become a popular feature for sharing short, creative videos that captivate audiences.
Google Photos memories presentations offer a wealth of content that can be repurposed to create unique and appealing Instagram Reels.
In this comprehensive guide, we will demonstrate how to convert your Google Photos memories video presentations into attention-grabbing Instagram Reels, allowing you to share your treasured moments with your followers in a fresh and dynamic way.
Step 1: Choose Your Google Photos Memories Presentation
Start by opening the Google Photos app on your device and locating the memories presentation you'd like to convert into an Instagram Reel. Browse through your memories and select the presentation that best captures the theme or story you wish to convey on Instagram.
Step 2: Utilize the Google Photos Sharing Option
After identifying the memories presentation, tap the 'Share' button and individually select the images you'd like to include in your Instagram Reel. By choosing the photos one by one, you have more control over which memories are featured, creating a cohesive and engaging narrative.
Step 3: Share the Selected Photos to Instagram
Once you have chosen the desired images, share them directly to Instagram. If Instagram isn't listed as a sharing option, save the selected images to your device's gallery first. Then, open the Instagram app and navigate to the Reels creation interface by tapping the '+' icon and selecting 'Reel'.
Step 4: Import the Photos into Instagram Reels
In the Instagram Reels editor, tap the 'Camera Roll' button and navigate to your device's gallery. Choose the saved images from your Google Photos memories presentation and import them into the Reels editor.
Step 5: Customize Your Instagram Reel
Arrange the imported images in the desired sequence, and adjust the duration of each photo to create a smooth and engaging Reel. Enhance your Instagram Reel with various effects, filters, and transitions offered within the app to make it more visually appealing.
Step 6: Add Music and Text
To further elevate your Instagram Reel, add music and text overlays. Choose from Instagram's extensive library of royalty-free music or upload your own audio file. Text overlays can provide context, humor, or additional information to your Reel.
Step 7: Preview and Share Your Instagram Reel
After completing your edits, preview your Instagram Reel to ensure everything flows seamlessly and aligns with your vision. Make any necessary adjustments before exporting your Reel. Finally, share your Google Photos memories presentation as an Instagram Reel, using captivating captions and relevant hashtags to maximize visibility and engagement.
To have the video generated by artifical intelligence from your GooglePhotos memories turned into an Instagram story, simply open your profile, find in your IG Reels the one you’ve just created, and use the sharing option to share it as a story!
Conclusion
Converting your Google Photos memories presentations into engaging Instagram Reels is an innovative way to repurpose your cherished moments and share them with your followers in a new and exciting format. By following this comprehensive guide, you can create captivating content that resonates with your audience and helps you stand out on the ever-popular Instagram platform. So, start transforming those memories into share-worthy Instagram Reels today and watch your online presence grow!
Using the same process, you can also turn Google Photos memories into TikTok video using the TikTok video and image slideshow creation tools.