How to add users in SalesForce Lightning?
How to add users in SalesForce
Adding a new user to a SalesForce Lightning account is pretty simple, providing that you have the right access to be able to create one, and that the license will cover that user.
To add a new user to a SalesForce account, go to settings > setup > administration > users > users > new, and follow the instruction to add the new user to the account.
User setup creation menu
To add a new user to an account, start by going to settings > setup. The settings are accessible in the gear icon, on the top right corner of the interface.

On the left hand side menu, find the administration > users sub menu, and click on the arrow to expand it.

Then, open again the sub menu users that should have become visible after having expanding the user menu.

Now, in the users menu, simply click on the new icon to start the user setup procedure, which will occur in a new pop-up.
You can also, in that interface, see the list of users that currently exists for that account.

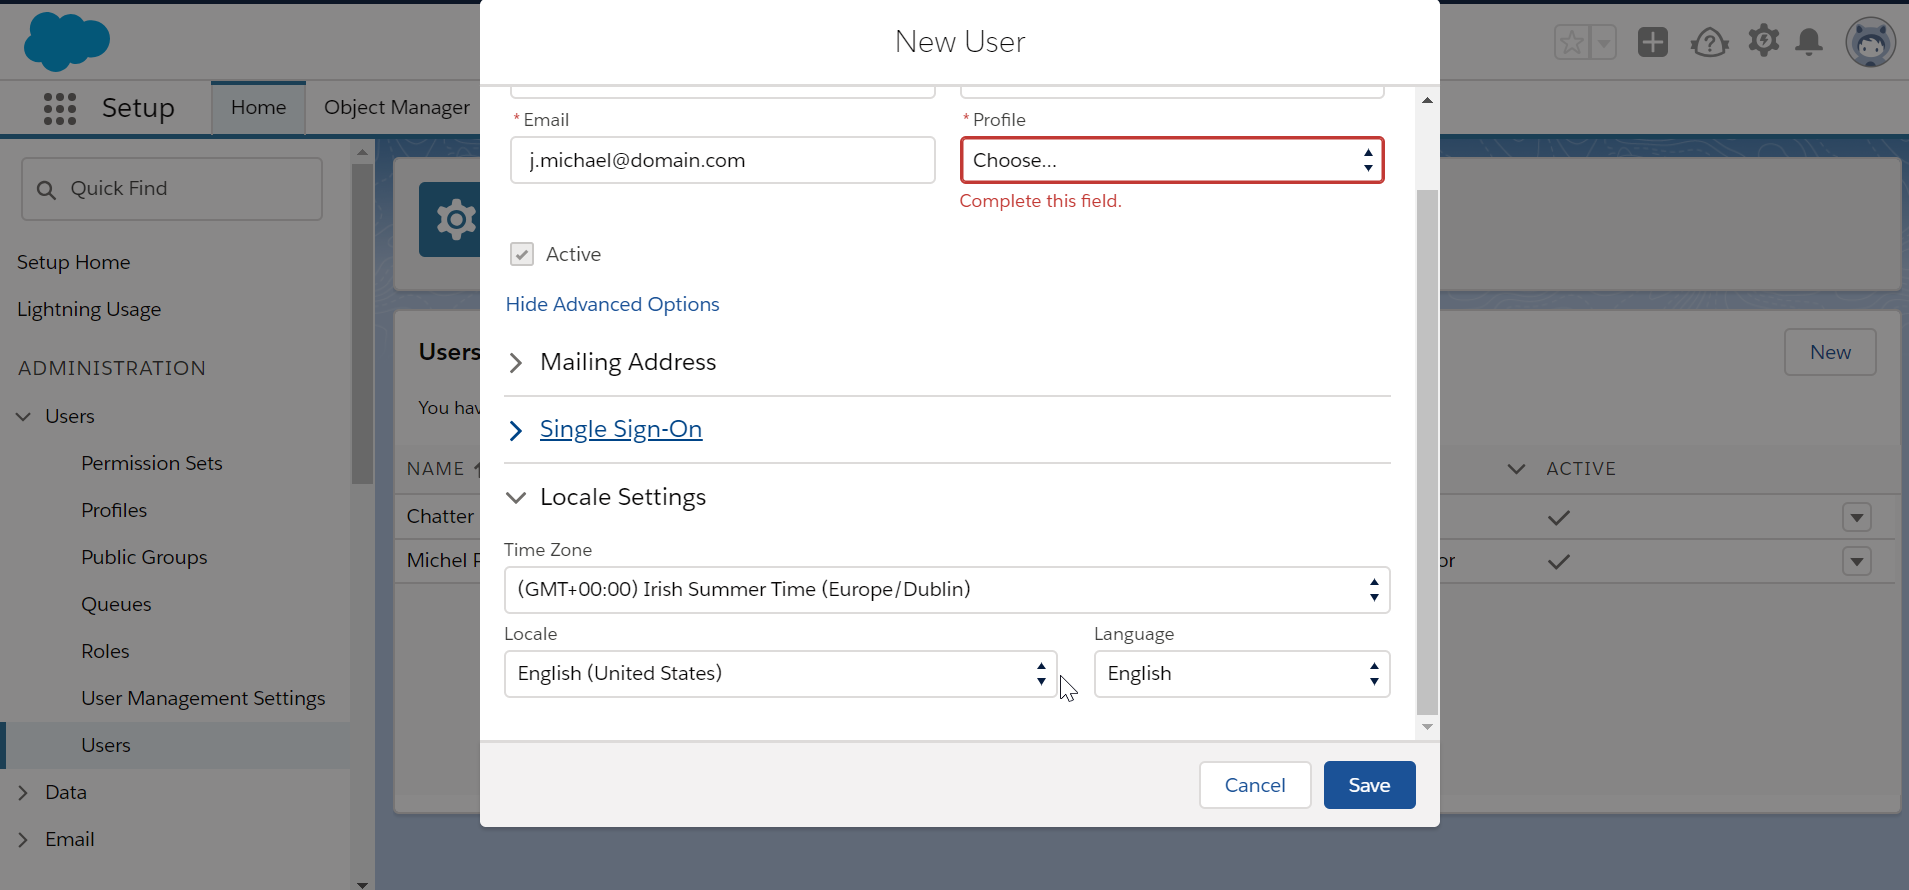
Create new user procedure
The first step when creating a new user, is to enter its name, first name, email address, and select a profile for that user.
The profile must be predefined, and can be something like chatter free user, standard user, or system administrator, for example, as defined on your system.

In the advanced options, it is possible to setup a mailing address for that new user, with its street, city, state or province, zip or postal code, and country.

In the single sign-on advanced options, the user can be setup with a single sign-on federation ID, in case he has one.
It will allow that user to be shared across multiple apps.

Finally, the locale settings will allow to add the new user with its favorite time zone, locale and local language, as per available SalesForce interface languages.

User created in the system
Once the new user has been added in the SalesForceLightning system, a confirmation message will be displayed on the screen, and the interface will take you back to the users management screen, where all users that have access to that instance will be listed.
It is also possible to de-activate a user from that interface.


