
How to screen record Windows for free with PowerPoint?
Did you know that PowerPoint can screen record for free
That is right, you read well – if you have Microsoft PowerPoint installed on your computer, you can now screen record for free your Windows desktop, with a very good quality.
If a PowerPoint presentation is on presentation mode, you can turn the PowerPoint presentation into a video, and otherwise, you can turn anything on your computer into a video, simply by having it being shown on the screen, and including registering your microphone.
That is actually one of the best way to create amazing online courses such as this course on SAP Operational Procurement for purchasing processes.
Online course on SAP Operational Procurement registered with PowerPoint video recording feature
Using PowerPoint to make a video
To start using PowerPoint to make a video, open a PowerPoint presentation, and go to a slide in which the video will be inserted.
It doesn’t have to be the final location of the video – but at the end of the video recording, the screen recording will be inserted as a file that can be played from the presentation, and the video can be saved on the computer from there.
To start creating and inserting a screen recording using PowerPoint, open the menu Insert > Media > Screen Recording > Insert screen recording.

Making a screen recording video with PowerPoint
Before starting the screen record, an overlay will appear on top of the screen on the previously opened window, as PowerPoint guesses that by default you want to record the last open window before starting the screen recording.
If a presentation has been started in presentation mode, and you have switched back to the PowerPoint window by using ALT+TAB keys, then the screen recording will be the PowerPoint presentation.
You can activate the microphone audio sound recording, or select an area to record, or make it the whole screen.

If you choose to select an area to record, simply point at the top left corner of the area to record, click, and click again at the bottom right corner of the area to record.
To screen record the whole screen using PowerPoint, do this in the screen corners to have the whole screen recorded.

Then use the record button the start recording the area selected with or without audio as selected in the menu, by clicking on the record button, or pressing the keyboard combination Windows+Shift+R.

Recording the screen using Microsoft PowerPoint
Once the record start option has been clicked, a countdown will appear, allowing yourself to get ready for the video recording using PowerPoint.
The countdown will remind you that the screen recording can be stopped using the key combination Windows+Shift+Q, in order to end it without using the mouse to go to the top screen menu and show up in the final video.

After the end of the countdown, just do what is necessary to do for your video, and use the pop-up menu on top of the screen by moving your mouse there to pause, stop, activate or deactivate audio, or the keyboard shortcuts.

PowerPoint video recorded inserted in slide
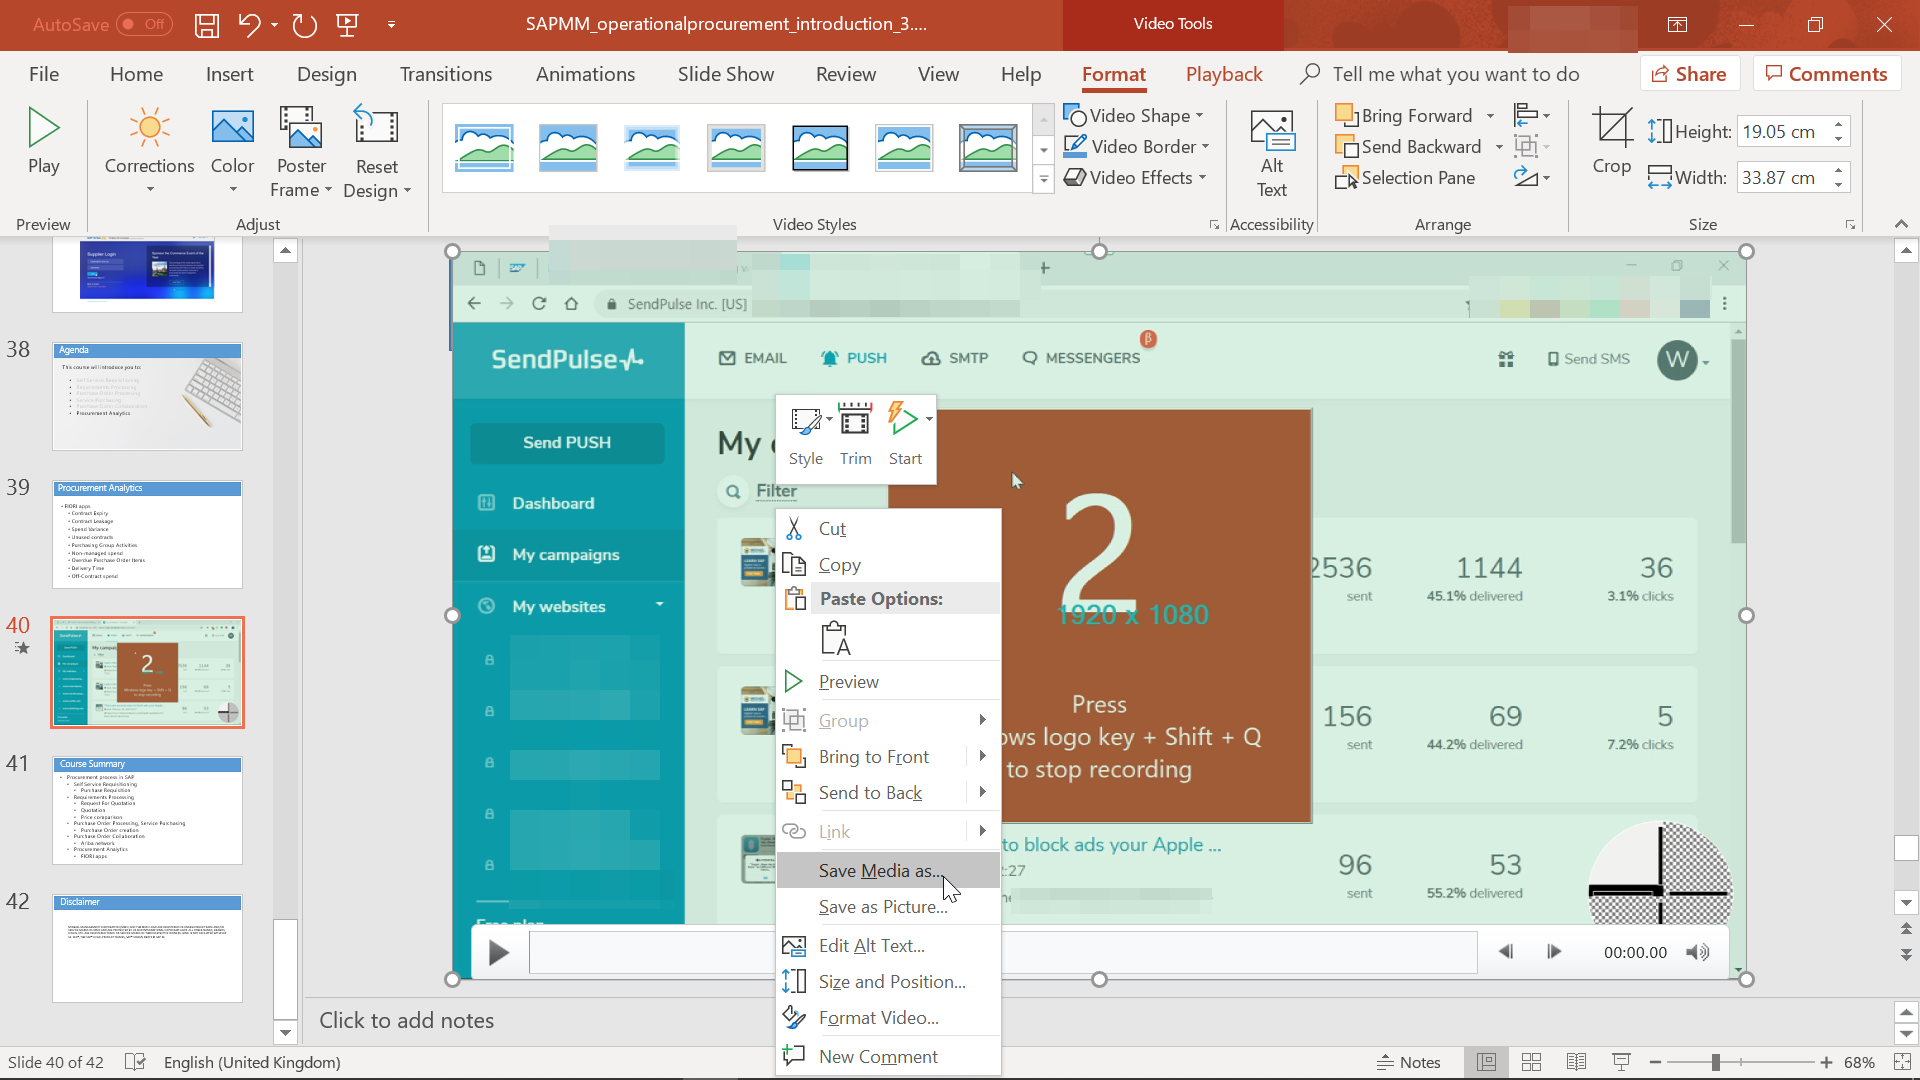
After the video recording using PowerPoint has been stopped, a frame of the video will be inserted in the slide – clicking on it will start playing the recorded video right into PowerPoint.

To save the video in a local file on the computer, and use the screen recording for other purposes than inserting it in a PowerPoint presentation, right click on the the video frame that is displayed in the slide, and selected the save media as option.

A Windows save media as pop-up will appear, allowing to select the file location destination, the file name, and eventually the file type, by it should be only possible to select media file mp4.
