

How to make a what am I filter for Instagram in Spark AR Studio?
How to make a what are you AR filter on Instagram?
Creating your own What are you augmented reality filter can be simply done using the Spark AR Studio software, by using a blank project, putting a random integer selector, and adding one solution per image. This will display a rapidly changing selector, that will be stopped on a random image from the selection, in order to create a what are you filter for Instagram.
See below a full walkthrough in creating your very own Instagram what are you filter and share it with all your friends on your private or business Instagram account and share Instagram story to Facebook, or create it for your Facebook business page or private stories after have done the Instagram effect publication on Spark AR Hub.
How I create Instagram’s What Pokemon Are You Filter
Spark AR Studio download
Best Instagram AR filter
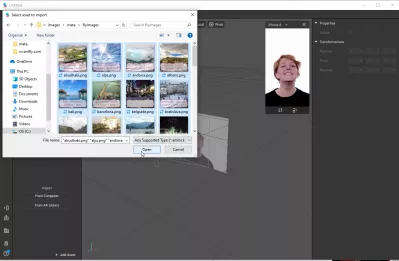
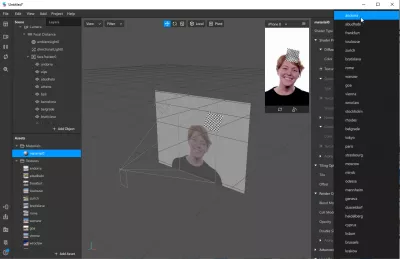
1- Upload all pictures as assets
Start by creating a blank project in the Spark AR Studio main window.

From that blank canvas, start by selecting all the pictures that you want to use for your project, and import them by using the import button, or by drag and dropping them to the correct area.
Make sure that pictures are already optimized, otherwise you make run into some troubles later, in case you import too many pictures and they are too big. The final package size cannot exceed 40MB in any case, which includes all assets, but also, the lower the Instagram AR filters and Facebook AR filters packages, the better – ideally, they should end up at less than 1MB to be easy to download.
2- Add one plane facetracker per assets
The next step is to add one general facetracker that will follow the face movements, and to which the images will be attached, and move accordingly. Right click in the scene area and select add > face tracker.
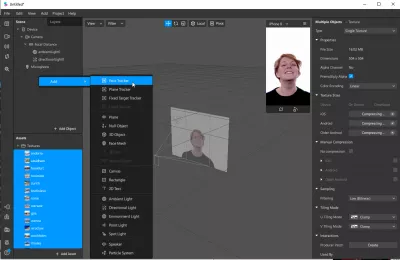
Then, under this newly created facetracker, add one plane element per image that has been important and that will be used in the Instagram what are you filter by right clicking on the main face tracker and selecting add > plane element.
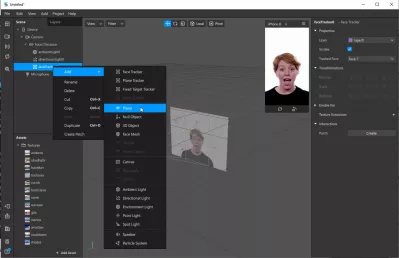
Make sure to rename every plane element accordingly, otherwise it might easily become messy and difficult to recognize them between each other.
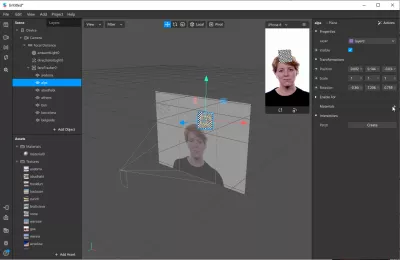
Once all plane elements have been created, one per asset image, select them all and move them as you want in the main screen.
By default, the facetracker is in the middle of the face, but you might want your pictures to be displayed above the head for example, or in front of some specific face part.
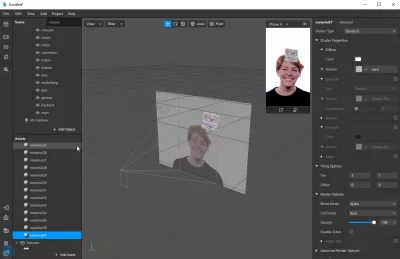
3- Link each facetracker to an asset with a material
After have created all plane elements, select them one after one, and enable them for materials on the right hand side – select new material everytime.
For each new material created, select it, click on texture, and assign it the corresponding texture. Each plane element should have one material created that has one texture assigned. Repeat the exercise for every single texture.
At the end, you should end up with the same number of texture asset elements, of plane elements under one facetracker, and of material assets, each of them linked together to a corresponding texture.
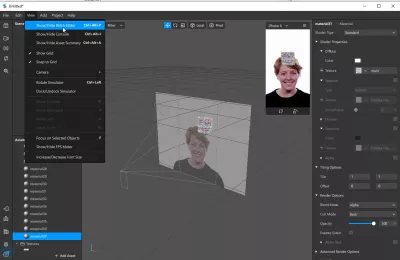
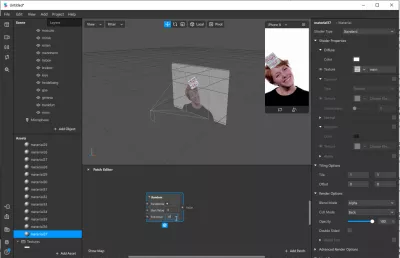
4- Create a random selector
Now that all assets are created and linked together, and that they are properly placed on the face tracker followed on the camera, it is time to start coding the random selector – don’t worry, everything will be visual, there won’t be a single line of code.
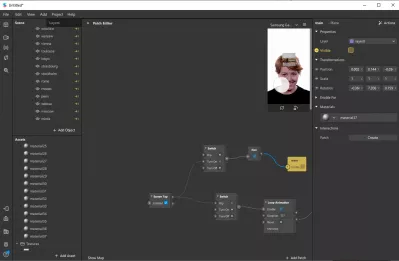
Start by displaying the patch editor by using the Spark AR Studio menu view > show/hide patch editor.
utorial: Using the Spark AR Studio Patch Editor
For every element that we will be adding in the patch editor, it is possible to add it by right clicking in the patch elements area, and using the elements search function by typing a few letters that are related to the patch we want to use.
In some cases, patches will be proposed by the application, in some other cases, it will be necessary to find them ourselves in the patch catalog using this window.
Start creating your first patch by entering the word RANDOM and selecting the corresponding RANDOM patch.
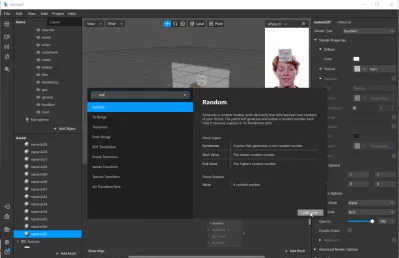
Now, this random element will be used to generate a random number starting from 0 and finishing at the amount of pictures we want to randomize minus one.
In our case, with 37 pictures, our random counter will start at 0 and finish at 36.
5- Add one solution per pictures
Now that we have created a random number selector, we have to create one solution per image.
There are several ways to do so – for example by creating one rounding function per image.
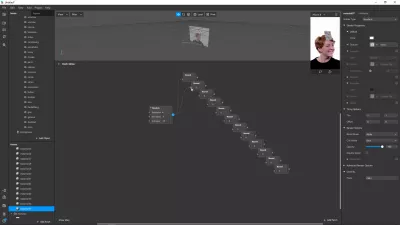
After the round patches have been created, add one element “EQUALS EXACTLY” per final image.
Each EQUALS EXACTLY element will match another integer, starting from 0 until the maximum amount of pictures minus one, in our case it will be 36.
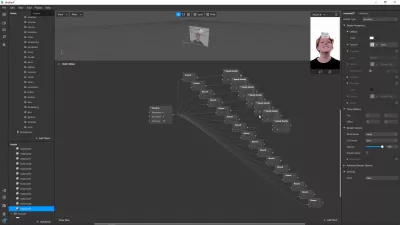
Finally, drag and drop each facetracker plane element – or all at once – and drop it near the equals exactly elements. Don’t forget to click on the arrow before visible property of one of them – meaning the visibility property will be triggered by the equals exactly function.
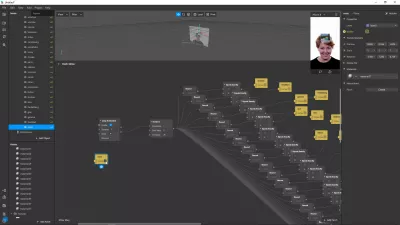
Then, proceed by linking all round elements to the random patch, each round patch to one equals exactly patch, and each equals exactly patch to one facetracker plane element.
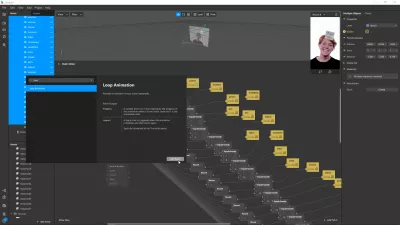
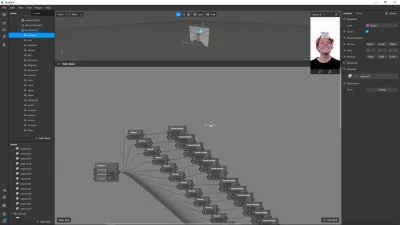
6- Loop the animation and start it with a screen tap
When all elements have been linked together, it is time to add a loop, in order to continually run through the whole test, and select another plane element to display at once, thus showing the carousel effect of the Instagram what are you filter.
Add a loop animation to the patch zone.
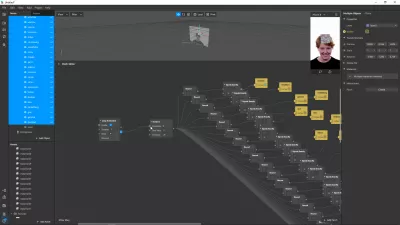
Link the loop animation to the random patch, meaning that while the loop animation is active, it will trigger the random patch element, until the loop is over.
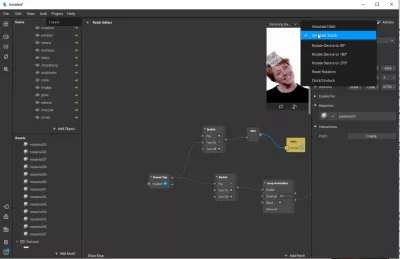
Finally, we want to start by showing a static image, a main image. Add the main image before the loop animation, add a screen tap element, and add two switch element plus one not element.
We will start with a screen tap: by default, we only see the main picture, which is visible.
Spark AR: The rules of making filters for Instagram
The first switch element, will turn the main picture to not visible when screen tap is triggered.
The second switch element, will start the loop animation at the same time that the main picture is hidden, thus displaying the image carousel.

7- Publish your Instagram AR filter!
And that over, our Instagram what are you filter is ready, it is now time to test it.
On the smartphone preview window, select the simulate touch option, and click in the display to start the random image selection process!
To reset the smartphone emulation and tap again to start, use the reset icon on the left toolbar, below the file menu.
Then, to check the result, use the send to app option on the lower left toolbar.
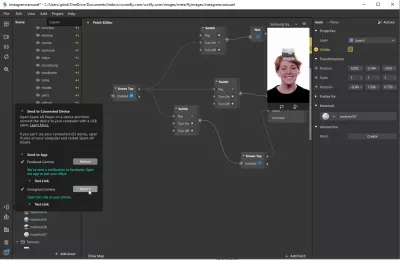
By using the Facebook camera option, you will get a private notification on Facebook to invite you to test your new Facebook AR filter privately.
By using the Instagram camera option, you will get a private notification on Instagram to invite you to test your new Instagram AR filter privately.
Both of them will have the same effect – you will be able to test your augmented reality filter privately on your own device, and also to take valuable screenshots that will be necessary to upload the AR filter in Spark AR Hub.
Spark AR Hub
Best Instagram AR filter