

Install the native Windows 10 SSH client PowerShell in few steps
Native Windows 10 SSH powershell
Since Windows 10, there is now a built-in Windows SSH client that is not installed by default, but that can be added as an optional through the settings menu.
An SSH, for secure shell, is an encrypted communication protocol to exchange information between a client and a server such as a CPanel domain server.Most web servers must be accessed using this protocol for many operations, including system operations such as creating symbolic links on your best cheap web hosting server for example, and run all kind of operations that will help you make money online or at least manage your web hosting better.
It is usually recommended to use SSH protocol through a secure VPN connection to make sure that no information can be stolen on the way.
Secure Shell – Wikipedia
See below a full walkthrough to install and be able to use the SSH shell for Windows.
How to Enable and Use Windows 10’s New Built-in SSH Commands
Find the Win SSH client and server in Windows 10
Both the SSH client for Windows 10 and the SSH server for Windows 10 can be found at the same place in the Windows settings.
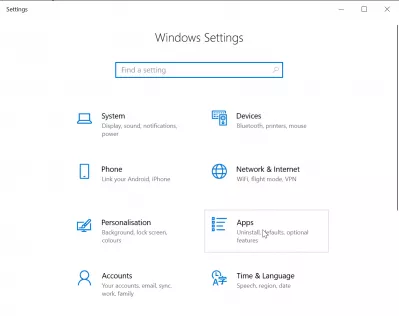
Start by opening the settings application, which can be accessed from the Windows search option in the Windows menu bar.

In the Windows Settings, open the Apps tile, that will allow to find, install and uninstall defaults and optional features in your Windows 10 installation.
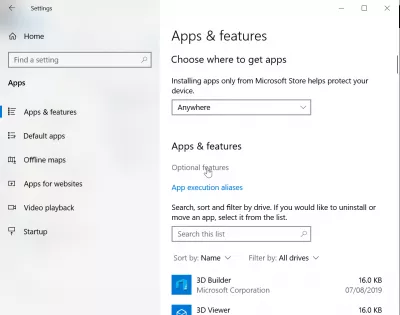
Once in the Apps and Features menu, locate the optional features link.
Have you read?
SSH client and server in Windows 10 optional features
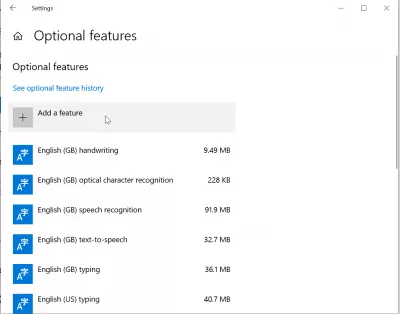
Now in the optional features, the Windows SSH client will most likely not be visible in the main applications list.
Click on the add a feature button to access more optional features of the Windows 10 system.
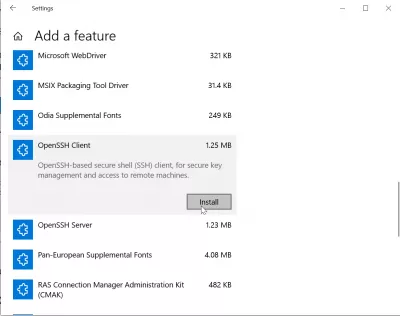
From the add a feature features list, scroll down until you can see the OpenSSH client, this is the built-in Windows SSH client that we want to install.
Windows OpenSSH client: OpenSSH-based secure shell (SSH) client, for secure key management and access to remote machinesYou can also find in that same window the OpenSSH server application, in case you need it.
Click on the Install button to start installing the SSH secure shell client Windows 10.
Using the SSH shell for Windows 10
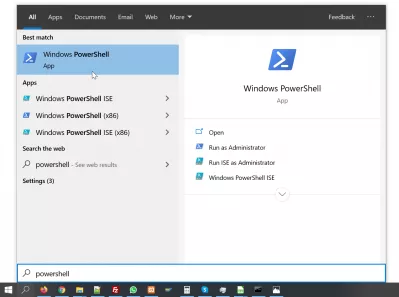
Now that the Windows SSH client has been installed on Windows 10, it can be found in the Windows 10 search and launch applications menu, by searching for the “Windows PowerShell” application.
Built-in Windows SSH client app: Windows PowherShellFind it from the Windows 10 application list or quick launcher, and start it.
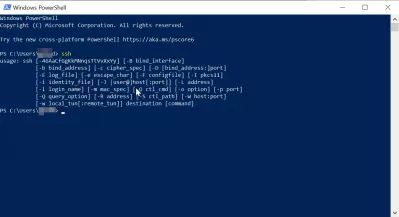
And that’s it! From the Windows PowerShell, you are able to start an SSH session and connection to your SSH server as usual, without having to install any extra application or program, but only using the built-in Windows SSH client.
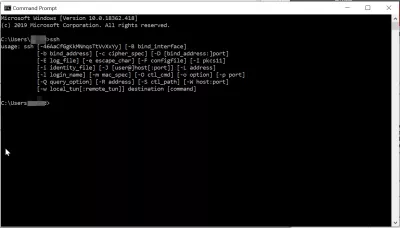
WIN SSH options and details: type SSH in Windows PowerShellYou can now use the SSH command line from either the Windows PowherShell or the Windows CMD SSH program, both having the same effect now that the Windows SSH client has been installed.
Do not forget to run them as administrator in case of using advanced options.
Connecting via SSH to your server – Media Temple
Takeaway from installing Windows SSH client
It is pretty to use the Windows 10 built-in application to use SSH client capabilities right from Windows 10, without having to download and install external programs.
Windows SSH client and server: Settings > Apps > Optional features > Add a featureHave you been using the Windows PowerShell, did you experience any issue with it? Have you been able to connect via SSH to your favorite best cheap web hosting, were you using a VPN connection? Let us know in comments.